

Manage Passengers
As a travel agent, you may need to edit or update passenger details that were entered during the booking process. The Travel Workbench allows you to easily modify these details using the Manage Passengers option.
This guide explains how to update primary passenger information, with additional sections for contact details and frequent flyer numbers.
Prerequisites
Before you can manage passengers, you must retrieve the PNR you want to modify. Refer to the Retrieve an Order guide for instructions on finding your booking.
Step 1: Access the Manage Passengers Screen
Once you are on the Order View page for the retrieved PNR:
- Locate the Passengers section.
- Click the Manage passengers button located at the top right of the section.
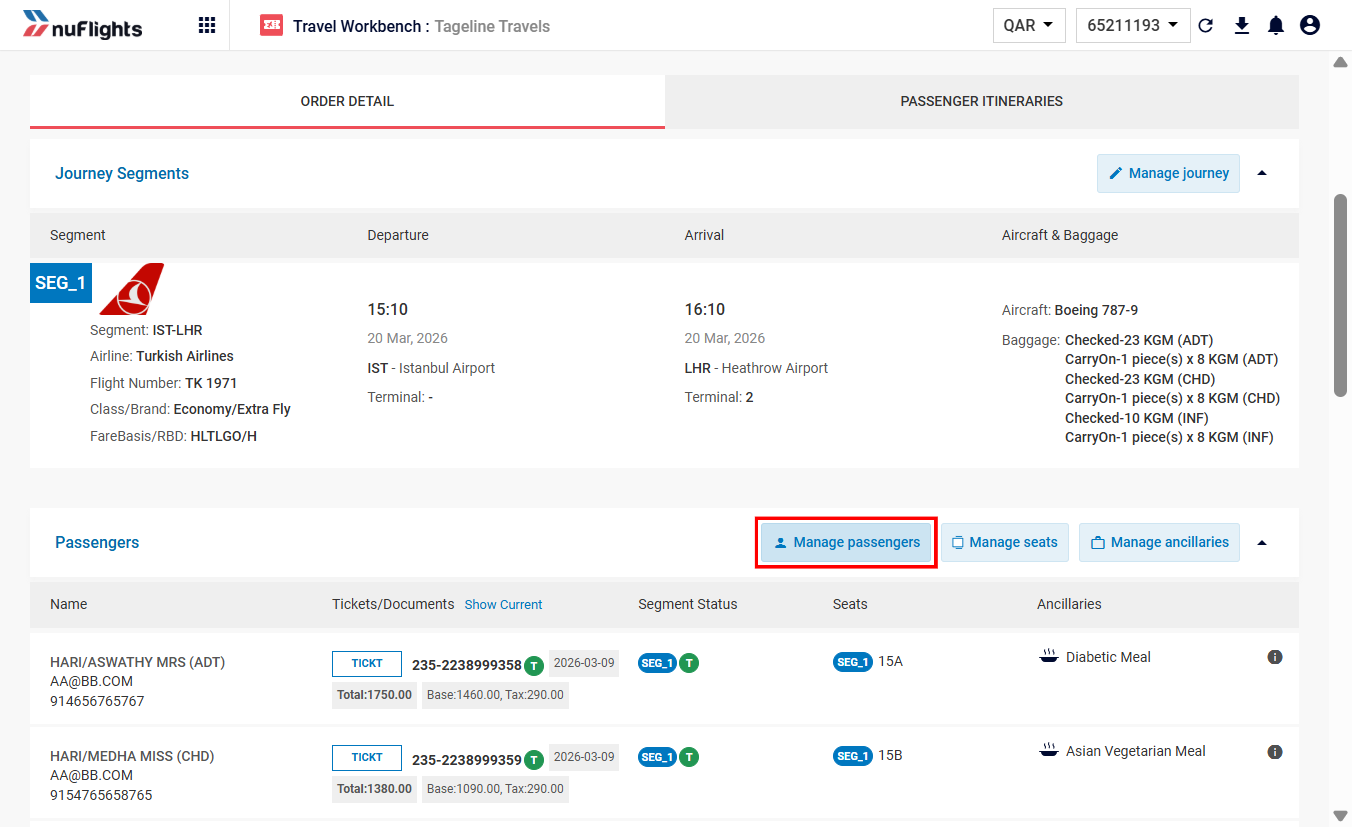
Clicking the Manage passengers button
This will open the Passenger details overlay screen where you can make your modifications.
The Passenger details screen
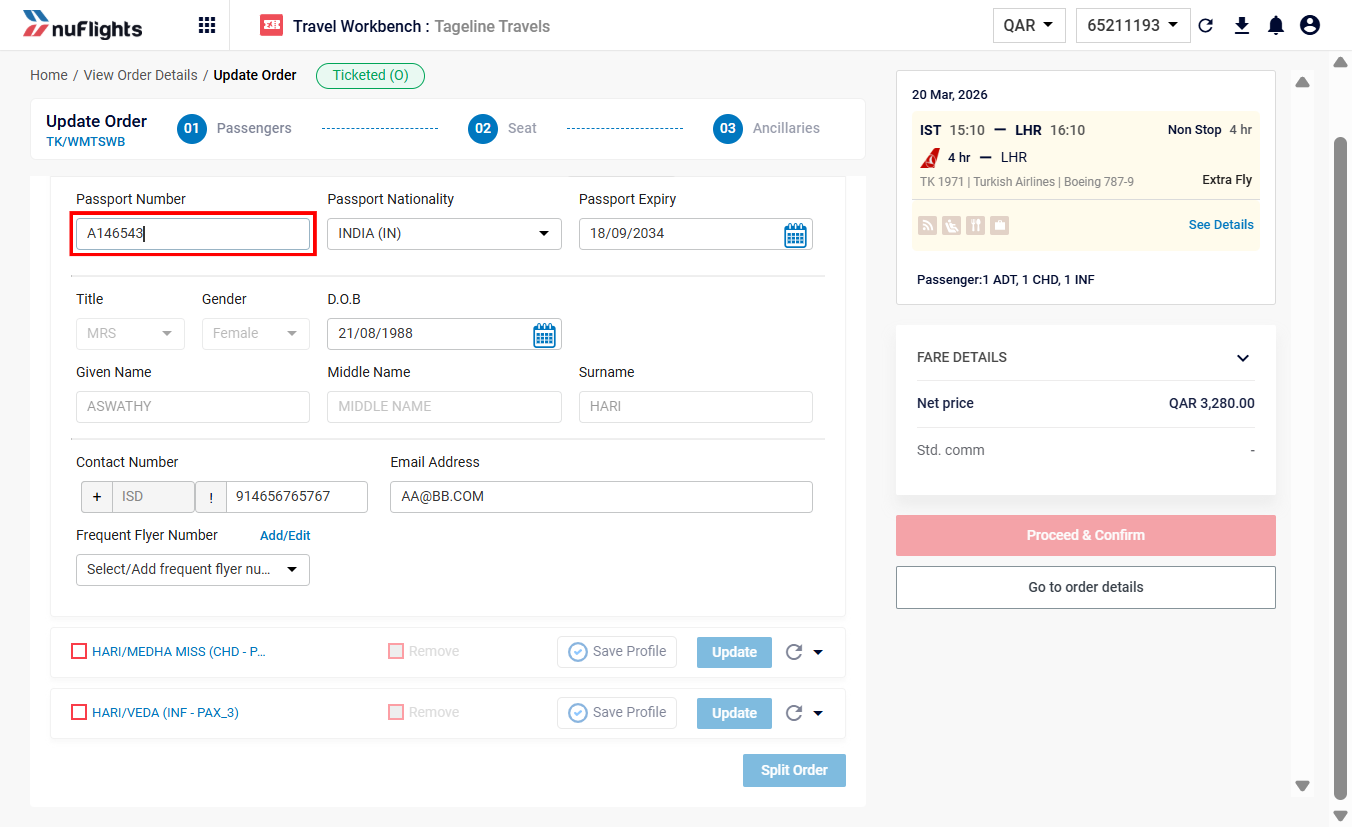
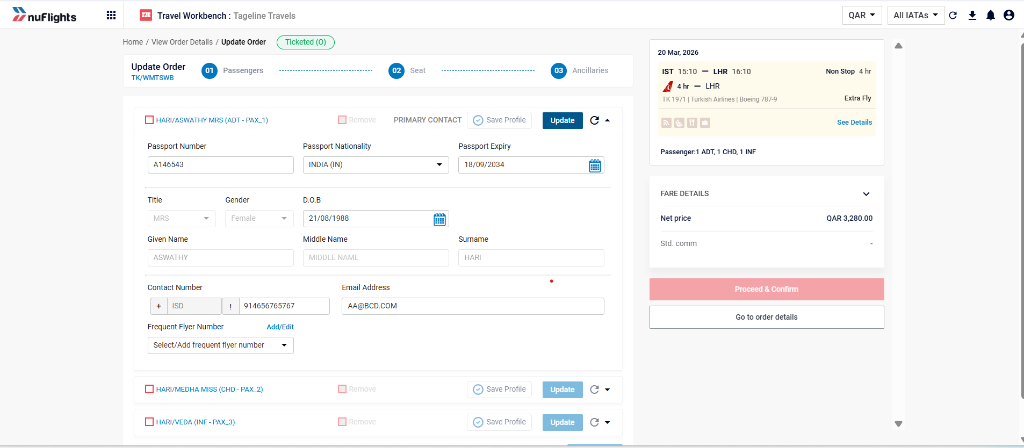
Step 2: Update Primary Details
In the Passenger details screen, you can update essential travel documents and identifying information.
You can edit details such as:
- Passport Number
- Nationality
- Passport Expiry Date
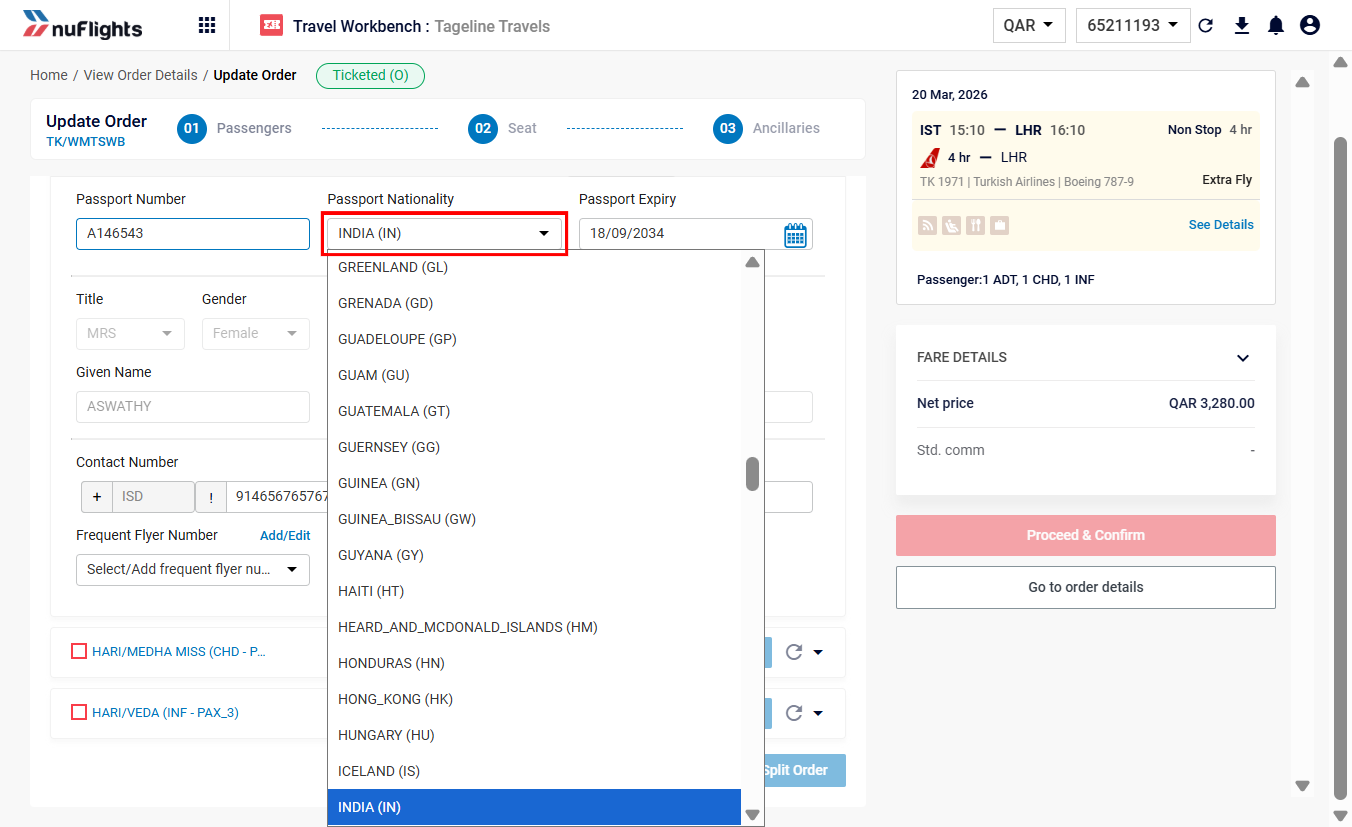
Updating passport and nationality details
Make the necessary corrections to these fields directly in the form.
Additional Optional Updates
The Manage Passengers screen also allows you to update several other important passenger details.
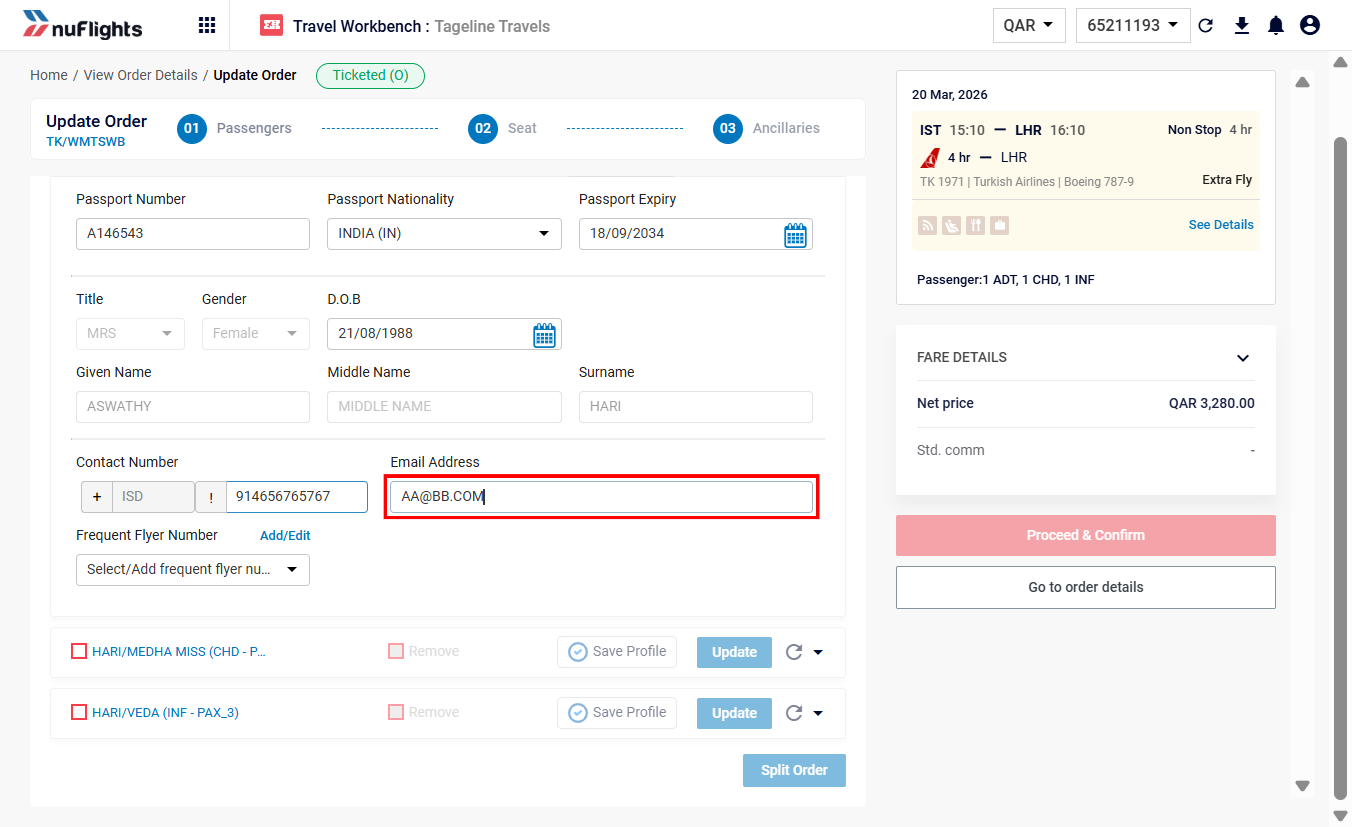
Update Contact Information
If you need to correct or update how the passenger is contacted, you can modify the following fields:
-
Date of Birth: Ensure age-related pricing and identification are accurate.
-
Contact Number: Update the primary phone number for the passenger.
-
Email Address: Update the email where itineraries and updates are sent.
Add or Update Frequent Flyer Numbers
If the passenger has a loyalty account with the airline, you can add their frequent flyer number so they receive credit for the trip.
- Locate the Frequent Flyer Number field in the passenger's details.
- Enter the corresponding loyalty number.
(Note: Depending on the airline, the system may validate the number immediately upon entry.)
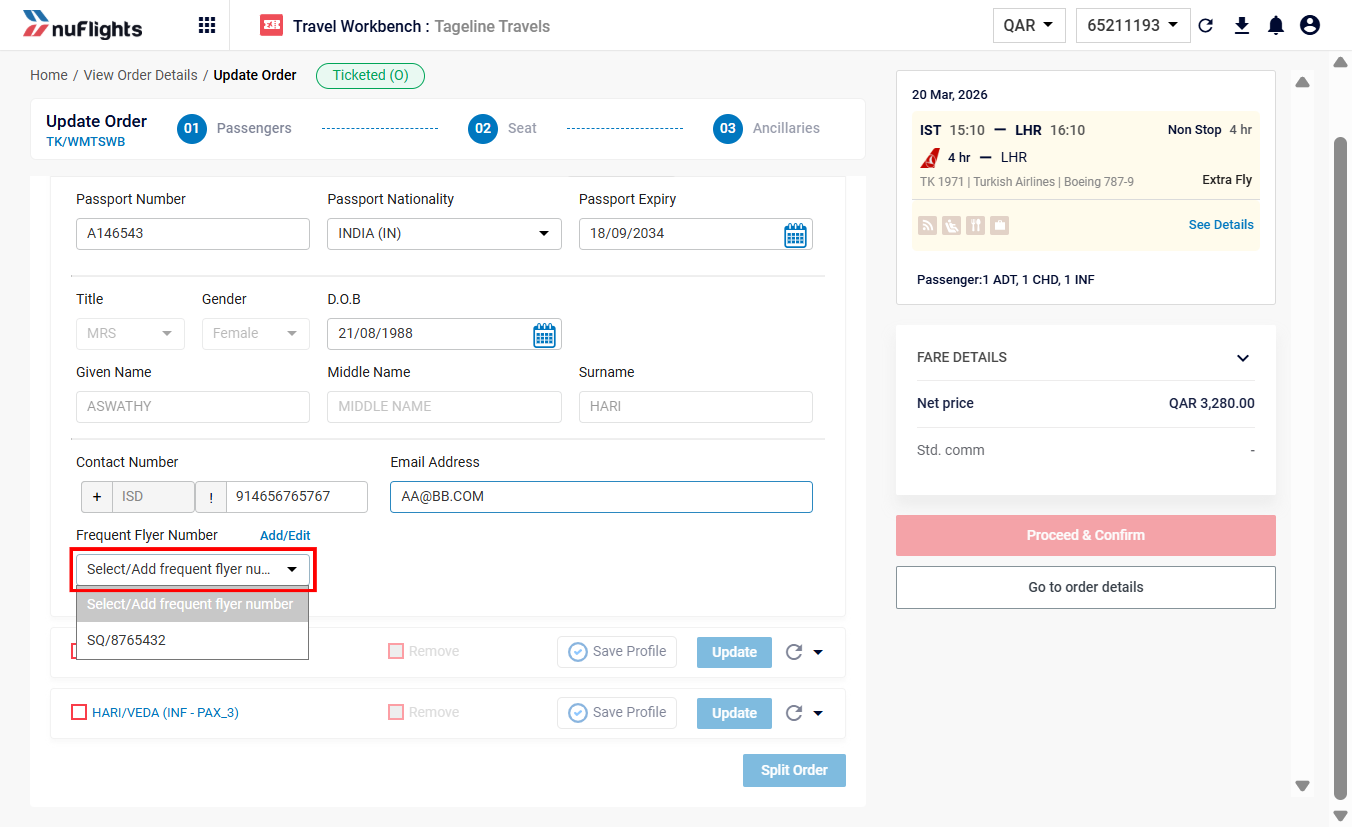
Successful Frequent Flyer validation
Step 3: Save Changes
After you have made all the necessary modifications (passports, contact info, or frequent flyer numbers):
- Click the Save or Update button (typically located at the bottom of the screen) to apply the new details to the PNR.
Saving the updated passenger details
The passenger information will now be updated in the NuFlights system and synchronized with the airline.