

Manage Seats
Travel agents can view the airline's seat map and assign specific seats to passengers. This includes both free and chargeable seats.
Prerequisites
Before managing seats, you must retrieve the booking. Refer to the Retrieve an Order guide.
Step 1: Access Seat Map
From the Order View page:
- Click on the Manage Seats button.
- This will open the graphical seat map for the flight's cabin class (Economy, Business, etc.).
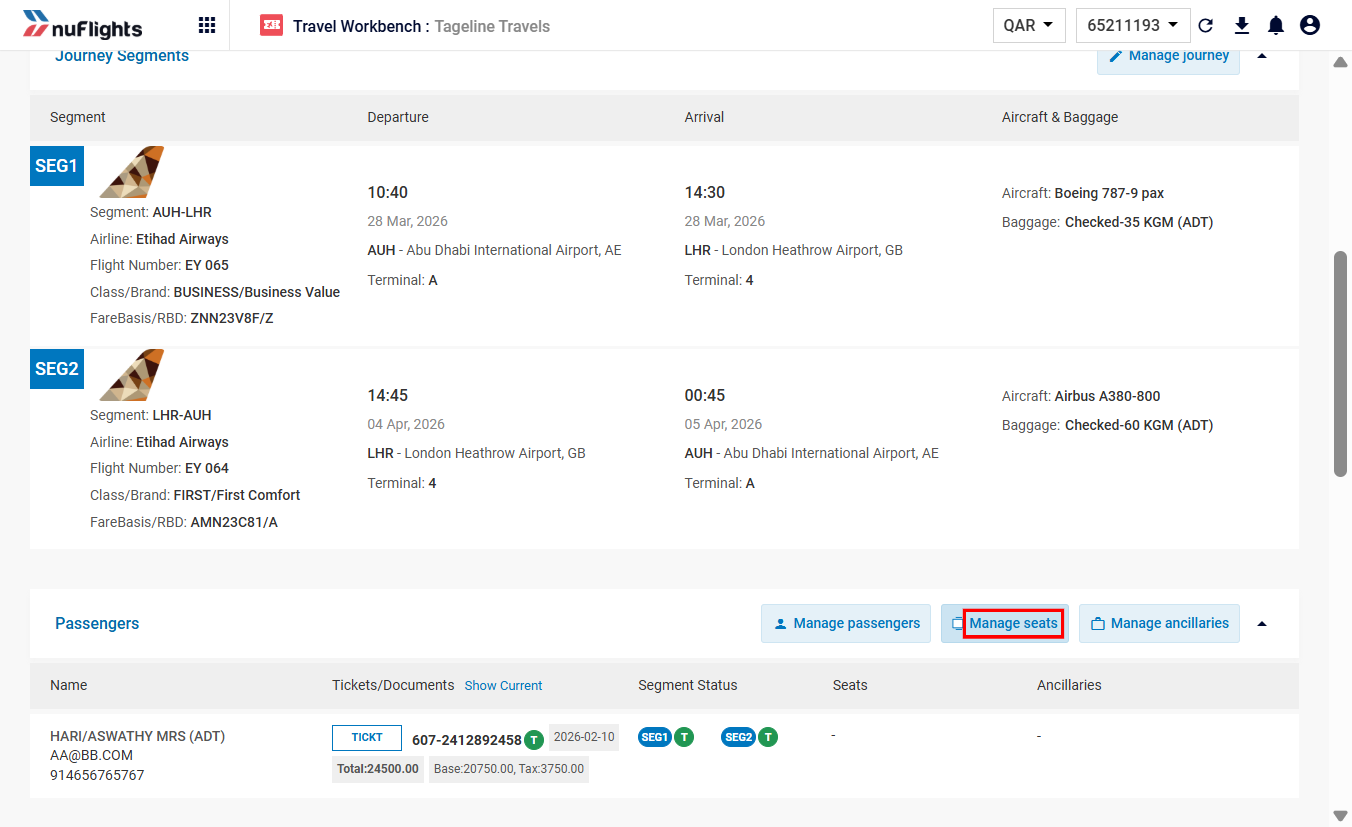
Accessing Manage Seats
Step 2: Select Seats
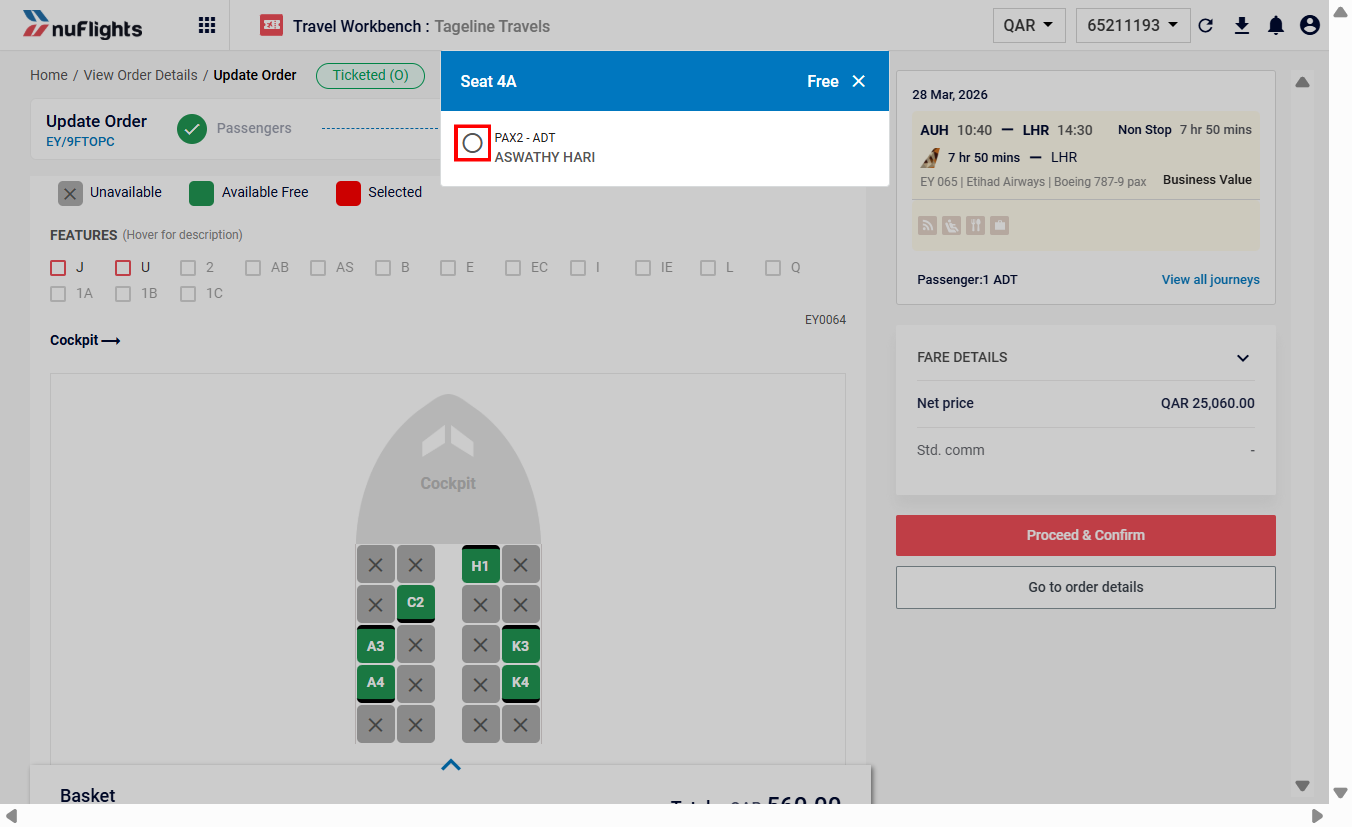
The seat map displays available seats with different attributes (e.g., window, aisle, extra legroom).
- View Details: Hover over a seat to see its details, including price (if chargeable) and features.
- Select a Seat: Click on a desired seat.
- Assign Passenger: A popup will appear listing the passengers. Select the passenger to assign to this seat.
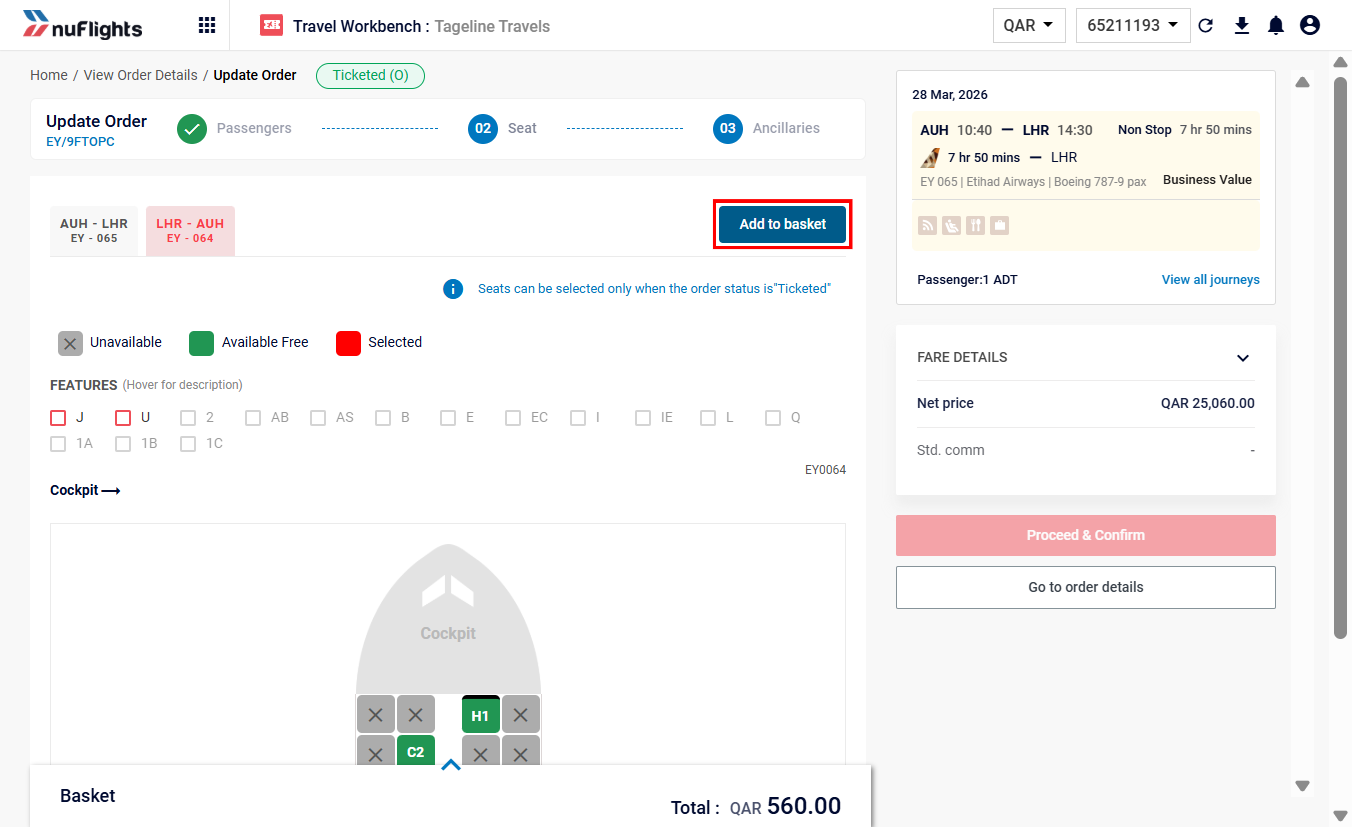
- Add to Basket: Click Add to Basket to save the selection.
Selecting a seat from the map
Assigning a passenger
Step 3: Confirm Selection
- Repeat the process for other passengers or segments if needed.
- Review the Basket to ensure all assignments are correct.
- Click Proceed and Confirm to finalize the selection.
Step 4: Payment (If Applicable)
If you selected chargeable seats, payment is required to issue the EMD.
Payment for Seats
For instructions on completing the payment for chargeable seats, please refer to the Making payments & issuing tickets guide.
Step 5: Verification
After confirmation:
- The Order View page will display the assigned seat numbers for each segment.
- If payment was made, the associated EMD will be listed in the order details.
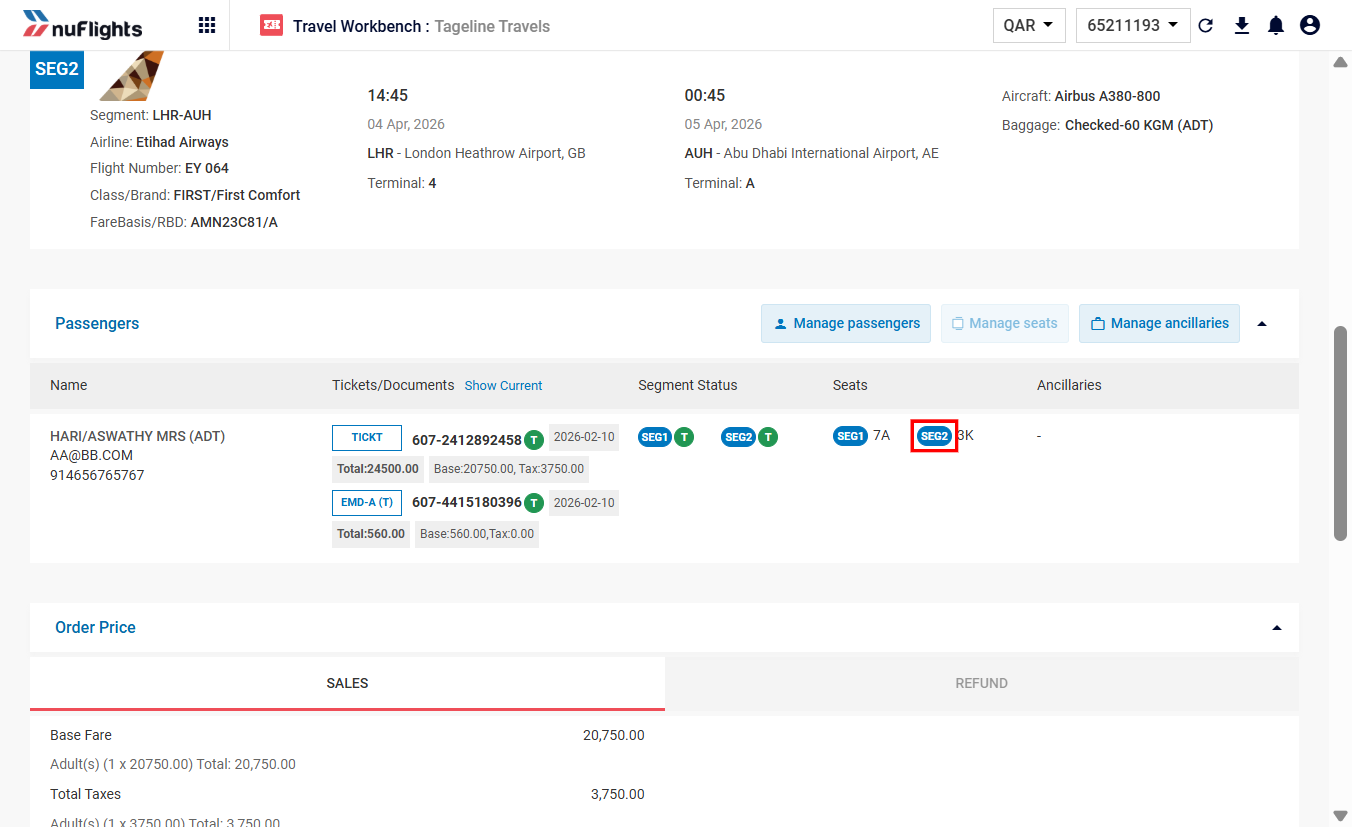
Order updated with seat assignments